
Have you ever thought about why so many developers are talking about Flutter? Since its inception in
2017, Flutter has become a favorite among coders for building nifty, natively compiled mobile, web,
and desktop applications from a single codebase. This rise to prominence isn’t just hype; its
substantial adoption rates back it. As of the latest reports, over 2 million developers are actively
using Flutter less than five years after its release, and it has been featured in more than 500,000
apps on various app stores.
Now, let’s shift gears a bit; why is cross-platform development grabbing headlines? In the digital
world, the ability to launch products quickly across multiple platforms is a game-changer for
businesses. This approach not only speeds up the development process but also significantly cuts
down costs. Instead of employing multiple teams to work on the same app for different systems, you
need just one cohort, knitting together codes that play well on Android and iOS. That’s efficiency
at its best!
Are you curious about what this guide has in store? Whether you’re a seasoned developer or a
newcomer
eager to dip your toes into app development, this guide promises a treasure trove of insights. We’ve
got you covered, from setting up your development environment and taking your first steps with
Flutter to diving deep into advanced features and best practices.
We’ll explore the nuts and bolts of Flutter’s architecture, demystify state management, and even
walk
you through making your app shine on the app store. Ready to embark on this exciting journey?
Let’s get fluttering!
What Exactly is Flutter?
Imagine this: You’re an artist, but instead of canvases, your medium is screens of all sizes-
smartphones, laptops, tablets, you name it. Flutter is your magic brush. It’s a free, open-source UI
software development kit created by Google. It’s like a one-stop shop for building visually
appealing, natively compiled mobile, web, and desktop applications- all from a single codebase!
Core Features of Flutter
Flutter is not just popular because it’s a trend; it’s genuinely packed with features that make
developers’ lives easier and their apps smoother and more attractive.
-
Fast Development and Hot Reload: Imagine changing your app’s code and
seeing it
come to life in seconds. That’s a hot reload! It helps you experiment, build UIs, add
features,
and quickly fix bugs. Flutter’s hot reload feature is a real game changer for productivity,
making it easier to iterate rapidly on your design without restarting your app or losing its
state. -
Expressive and Flexible UI: With Flutter, your creative side has no bounds.
You
get a rich set of widgets to craft your apps with all the visual oomph you can imagine.
Whether
aiming for a minimalist look or vibrant animations, Flutter gives you the tools to design it
easily. -
Native Performance: Despite all the magic, the result is always a smooth,
cutting-edge app that feels completely native. Flutter’s approach ensures that your app can
directly compile to native code, which helps your applications run swiftly and smoothly on
every
platform.
The Dart Programming Language
-
Outline and Benefits of Dart: Flutter uses Dart, a language optimized by
Google
for building applications that need to be fast and aesthetic. It’s easy to learn, especially
if
you’re familiar with languages like JavaScript. Dart is excellent for Flutter because it
allows
developers to write fast and scalable programs. It’s designed to provide a smooth and
predictable performance across all platforms, which means fewer surprises when you move from
development to production. -
How Dart Complements Flutter: Dart complements Flutter like peanut butter
complements jelly. It’s made to match Flutter’s architecture, providing features like
just-in-time compilation for faster development cycles (thanks to hot reload) and
ahead-of-time
compilation for fast, predictable, optimized performance in production environments. Dart
also
supports Flutter in crafting complex animations and transitions that look and feel fluid,
making
the user experience seamless.
-
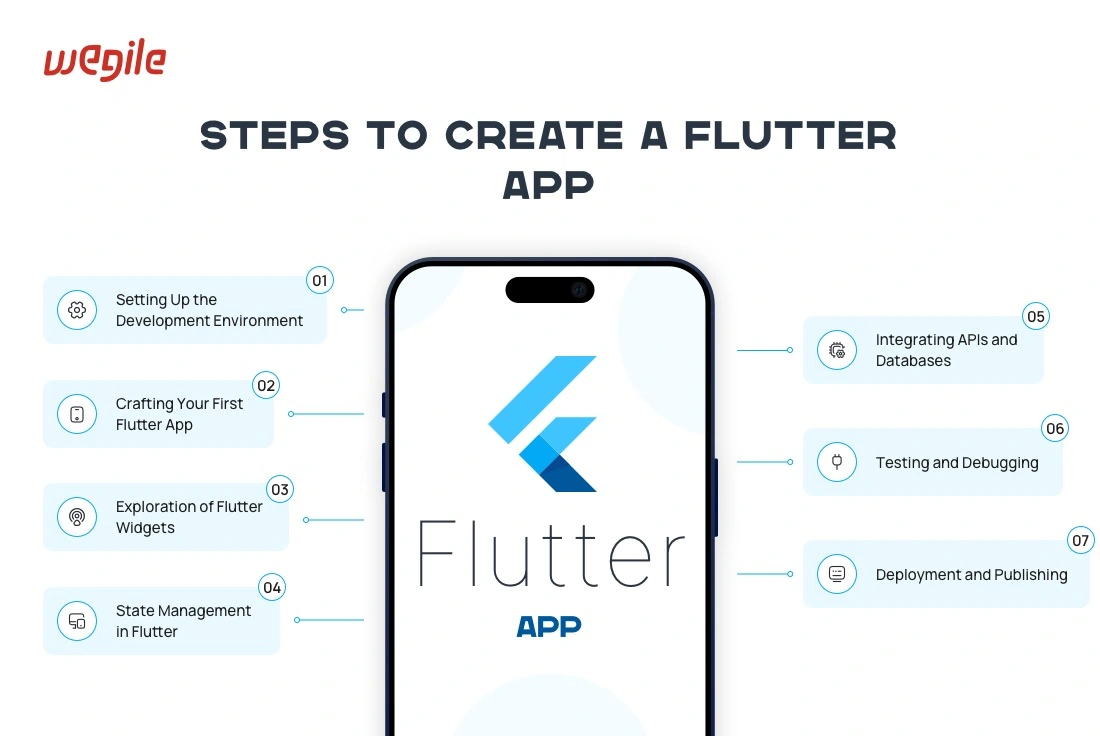
1. Setting Up the Development Environment
Starting with Flutter is like preparing your kitchen before cooking a new recipe. You need
the right tools and setup to ensure everything runs smoothly. Let’s walk through the
essential steps to prepare your development environment so you can start building
mobile apps
with Flutter!System Requirements
First, let’s ensure your computer is ready to handle Flutter. Your system doesn’t need to be
top-of-the-line, but it should meet a few basic requirements:-
Windows: You’ll need Windows 7 SP1 or later, at least 400 MB of
free disk space (excluding space for IDE/tools), and PowerShell 5.0 or newer, along
with
Git for Windows. -
MacOS: Mac users need MacOS (64-bit) version 10.13 or higher, about
700 MB of disk space, and the latest version of Xcode if they plan to develop iOS
applications. -
Linux: Linux users should have a 64-bit version of Ubuntu or
another Debian-based distro, at least 600 MB of disk space, and the latest version
of Git.
Installing Flutter SDK
Now that you’ve ensured your system can handle Flutter, it’s time to install the Flutter
SDK,
the software development kit containing everything you’ll need to build Flutter apps. Here’s
how you can do it:-
Download the Flutter SDK: Visit the official Flutter website and
download the latest stable release of the Flutter SDK. -
Extract the File: Once downloaded, extract the zip file to a
desired
location on your disk. Remember this path because you’ll need to refer to it later. -
Update Your Path: Add the Flutter directory to your system’s path.
This
step varies depending on your operating system but is crucial for using Flutter
commands
in your terminal.
Setting Up an Editor
Flutter is quite flexible in terms of editors. You can use whichever code editor you prefer,
but the most common ones are Android Studio and Visual Studio Code.-
Android Studio: Android Studio provides an integrated development
environment with built-in support for Flutter and Dart. To set it up, download and
install Android Studio, then install the Flutter and Dart plugins from the plugin
marketplace within the IDE. -
Visual Studio Code: If you prefer something lighter, Visual Studio
Code
is a great choice. After installation, simply install the Flutter and Dart
extensions
from the VS Code marketplace to enable Flutter support.
Configuring the Android and iOS
EmulatorsYou’ll want to set up emulators to see your app come to life without needing a physical
device.-
Android Emulator: Set this up through Android Studio. First, ensure
you
have installed the Android
SDK
via the Android Studio setup. Then, open the AVD Manager, create a virtual device,
and
download the necessary system images for the Android versions you want to test. -
iOS Emulator: Available exclusively on macOS, you can set up the
iOS
emulator directly through Xcode. Install Xcode through the App Store, open it,
navigate
to the “Preferences,” select the “Components” tab, and download your required
simulators.
Once you’ve followed these steps, your development environment will be all set up!
-
-
2.
Crafting Your First Flutter AppReady to build your first Flutter app? Let’s roll up our sleeves and jump in:
-
1. Open Your Editor: Start your preferred editor (Android Studio or
Visual
Studio Code). -
2. Create a New Flutter Project: Click ‘New Flutter Project’ (in
Android
Studio), open the command palette, and select ‘Flutter: New Project’ (in Visual
Studio
Code). -
3. Fill Out Project Details: Provide a project name and specify the
project location on your computer. -
4. Finish Setup: Click ‘Finish’ and wait for your editor to set up
the
project files.
Voila! You’ve created a new Flutter project. Now, let’s understand what’s inside.
Exploring the Structure of a Flutter App
A typical Flutter project contains several vital folders and files:
-
Lib folder: This is the primary directory where you’ll write most
of
your application code. It includes the main.dart file, which serves as the entry
point
of your application. -
pubspec.yaml: This file manages your app’s assets and dependencies.
Here, you can add external libraries, fonts, and image assets. -
IOS and Android: folders contain code specific to each platform and
are
essential when adding functionality or adjusting settings.
Basic Widgets and Their Uses
Widgets are the building blocks of your Flutter app. Here’s a quick look at some basic
widgets:-
Text: Used to display text on the screen. It’s customizable with
various fonts, sizes, and styles. -
Row and Column: These are used for layout. A Row arranges widgets
horizontally, and a Column arranges them vertically. -
Container: A multi-purpose widget that combines drawing,
positioning,
and sizing. The Container can hold a child widget and be styled with padding,
margins,
borders, and more.
Running the App on an Emulator
To see your app in action:
-
1. Open the Emulator: Start your Android or iOS emulator from your
development environment. -
2. Run the app: Click the ‘Run’ button on your IDE or type flutter
run
in
your terminal. You’ll see your app boot up on the emulator.
-
-
3.
Deep Exploration of Flutter WidgetsUnderstanding Stateless and Stateful
Widgets-
Stateless Widgets: These are immutable, meaning their properties
can’t
change; all values are final. Use them when the UI depends on the information within
the
widget itself and does not change over time. -
Stateful Widgets: These are dynamic as they can change during
runtime
based on user interaction or data changes. They maintain a state that might change
during the widget’s lifetime.
Commonly Used Widgets and Their
Practical Applications-
Scaffold: Provides a high-level structure for implementing drawers,
snack bars, and bottom sheets. -
ListView: Ideal for creating a scrollable list of elements, perfect
for
displaying a long list of items. -
FloatingActionButton: Commonly used for primary actions in an app,
like
adding a new contact or composing a message.
Custom Widgets and Reuse
Creating custom widgets is a powerful feature of Flutter. You can combine smaller, simpler
widgets to create more complex and reusable custom widgets. It makes your code cleaner and
promotes code reuse across your projects.Tips for Effective UI Design in Flutter
-
Keep it simple: Start with simple widgets and add complexity as
needed. -
Be consistent: Use a consistent theme across your app to maintain a
coherent look. -
Test on multiple devices: Always check how your UI looks on
different
screen sizes and orientations.
-
-
4. State
Management in FlutterThink of state management as keeping everyone’s order at a large dinner table. In app
development, “state” refers to the information or data your app displays and manipulates.
Managing state efficiently is crucial as it ensures your app behaves predictably and
maintains a smooth user experience as it grows more complex.Different Approaches and Their Suitable
Scenarios-
Provider: This is like having a helpful assistant at our dinner
party,
passing messages and updates between diners. It’s simple and effective for most
apps,
making it a go-to choice for many developers. It’s great when your app’s state
changes
are not overly complex but need efficiency. -
Riverpod: Imagine Provider got a promotion. Riverpod extends the
Provider’s capabilities, offering more flexibility and removing some limitations,
like
context dependency. It’s suitable for larger applications where you might need a
more
robust solution that’s still easy to manage. -
Bloc: Bloc stands for Business Logic Component. It’s like having a
manager for state changes. It ensures everything is in order by using events to
trigger
state changes. This method is excellent for complex applications with multiple
states
that need precise control and predictability. -
GetX: This is the multitasker of the group, handling not just state
management but also dependency injection and route management. It’s perfect for
developers looking for an all-in-one solution, especially in large applications
where
these aspects intertwine.
Pros and
Cons of Each Method-
Provider:
-
Pros: Simple to use, integrates well with Flutter, suitable
for beginners. -
Cons: It can get cumbersome in extensive applications with
complex state changes.
-
-
Riverpod:
-
Pros: More versatile and robust than Provider, does not
depend on context. -
Cons: Slightly steeper learning curve compared to Provider.
-
-
Bloc:
-
Pros: Excellent for complex state management, promotes a
clean architecture. -
Cons: More boilerplate code can be overkill for simpler
applications.
-
-
GetX:
-
Pros: Extremely efficient for large applications, reduces
boilerplate significantly. -
Cons: It can be complex and overwhelming for beginners and
has a steep learning curve.
-
-
-
5.
Integrating APIs and DatabasesIn the app development world, connecting to
RESTful APIs is like
dialing into a radio station; it lets your app receive data broadcasts from a server. To
integrate an API, you use HTTP requests to fetch data, which your Flutter app can then
process and display.Displaying Live Data in a Flutter App
Displaying live data is crucial in keeping your app users updated with the latest
information. Flutter can update its UI in real-time as data from APIs changes, which is
perfect for apps that rely on timely information, like news aggregators or social media
platforms.Overview of Using Databases in Flutter
-
SQLite: This is like a filing cabinet in your app where you can
store
data locally. SQLite is fantastic for apps that work offline or manage large amounts
of
data without continuous server queries. -
Firebase: Imagine having a cloud-based storage system that stores
data
and handles user authentication and dynamic server-side processing. Firebase is a
powerful tool for apps that require real-time data updates, user management, and
seamless online integration.
-
-
6.
Testing and Debugging Flutter AppsJust like a chef tastes a dish before serving, testing is crucial to ensure your app
performs
well under various conditions. Flutter provides a comprehensive testing suite designed to
handle different layers of your application:-
Unit Tests: They are quick checks to confirm that individual
functions
or classes work as expected. Think of them as testing each ingredient for freshness. -
Widget Tests: They evaluate single widgets in isolation. It’s like
ensuring each dish is perfectly cooked before it reaches the table. -
Integration Tests: These tests check how multiple components work
together, akin to testing the entire meal course to ensure every dish complements
the
others perfectly.
Overview of the Flutter Testing
FrameworkFlutter’s built-in testing framework is a versatile toolset that allows you to evaluate your
app’s reliability and stability rigorously. It provides a rich set of assertions to test the
app’s performance and behavior. It guarantees that everything functions as intended before
the app reaches your users.Best Practices for Debugging
Even the best chefs encounter unexpected issues in the kitchen. Here are some tips to
effectively debug your Flutter apps:-
Use the DevTools: Flutter’s DevTools suite is like having a
culinary
thermometer and a tasting spoon. It helps you inspect your app’s layout, view the
widget
tree, and monitor app performance in real time. -
Keep an Eye on Logs: As a chef listens to feedback, pay attention
to
log outputs. They can tell you exactly where things might be going wrong. -
Breakpoint Magic: Set breakpoints in your code to pause execution
and
inspect variables and computation steps at specific stages, much like pausing a
cooking
show to explain a technique.
-
-
7. Deployment
and PublishingBefore your app hits the app store shelves, it needs a bit of polishing:
-
Optimize Performance: Minimize resource usage and ensure the app
runs
smoothly on all target devices. -
Final Testing: Conduct thorough testing, including beta releases,
to
catch any unforeseen issues. -
Versioning: Update the app version and build numbers. It is like
labeling your dishes with the right ingredients and cooking instructions.
Deploying to Android and iOS
Flutter makes deploying your app to both Android and iOS platforms a streamlined process:
-
Build the App Package: Use Flutter commands to build an APK for
Android
or an IPA for iOS. -
Sign Your App: Digital signing is akin to putting a seal of quality
on
your product. Ensure your app is signed with the proper developer certificates.
Navigating App Stores’ Guidelines and
RequirementsEach app store has its own set of rules, much like different countries have customs
regulations:-
Review Guidelines: Familiarize yourself with the policies of the
Google
Play Store and Apple App Store. Ensure your app complies with their content,
privacy,
and functionality requirements. -
Prepare Metadata: This includes your app’s title, description, and
screenshots, which are like the cover of a cookbook. They need to be appealing and
straightforward. -
Submission and Review: The app will undergo a review process once
submitted. This is similar to a food critic reviewing a new restaurant. Your app
will be
approved and ready for users to download if all is well.
-
-
8. Advanced Flutter
-
Animations in Flutter: Imagine your app as a puppet show where
every
movement adds life to the story. Flutter enables this dynamic scenery through
powerful
yet simple animation tools. By defining animations, you can smoothly transition UI
elements on the screen, catching your user’s eye and enhancing the interactive
experience. From bouncing buttons to sliding menus, animations in Flutter make your
app
feel more intuitive and vibrant. -
Advanced App Architectures: A building needs a stronger framework
as
your app grows. Flutter supports advanced architectures that help manage a growing
project’s complexity without losing performance. Flutter is flexible enough to
accommodate whether you prefer the simplicity of Provider, the robustness of Bloc
for
state management, or even custom architectures that suit your specific needs. These
structures ensure that as your app scales, it remains maintainable and efficient. -
Package and Plugin Development: Think of packages and plugins as
specialty tools in a toolbox. By creating your means, you can provide solutions for
your
projects and those facing similar challenges. Flutter allows you to develop reusable
code packages or platform-specific plugins that tap into native features. This
ecosystem
enriches the community, fostering a space where solutions are readily available and
easily accessible.
-
-
9. Resources and
CommunityEmbarking on a Flutter learning journey? Here are some top-notch resources to fuel your
growth:-
Books: “Flutter for Beginners” provides a solid foundation, while
“Practical Flutter” can enhance your skills further. -
Websites: The official Flutter website is a treasure trove of
documentation, samples, and tutorials. For community-driven content, Medium and Dev.
have countless articles on specific Flutter topics. -
Courses: Platforms like Udemy, Coursera, and Pluralsight offer
detailed
Flutter courses that cater to all levels, from novice to advanced. -
Flutter Communities and Forums: Joining a community can
significantly
accelerate your learning curve. Places like the Flutter Dev subreddit, Flutter
Community
Slack, and Stack Overflow are bustling with discussions, advice, and support. These
platforms are perfect for connecting with fellow developers, sharing knowledge, and
finding solutions to common (and uncommon) issues.
-
Conclusion: Mastering Flutter with Wegile
Throughout this guide, we’ve taken a comprehensive journey through Flutter app development. From
setting up your environment and crafting your first Flutter app to diving into advanced topics like
animations and app architectures, we’ve covered the essential aspects that make Flutter an excellent
choice for developers. With Flutter’s ability to streamline the development process across multiple
platforms, its rich features, and its robust community support, you’re now equipped with the
knowledge to build and enhance your mobile applications.
Flutter’s future in app development looks promising. Its continuous updates and the growing
ecosystem
of packages and tools signify its staying power and potential to shape the future of cross-platform
development. Wegile, with its expertise in cutting-edge solutions, stands ready to help you harness
the full potential of Flutter, whether you’re building your first app or scaling up an existing
project.
Are you inspired to transform your app ideas into reality? There’s no better time to start than now.
Join the ranks of innovative developers using Flutter to create stunning, high-performance
applications. With Wegile’s expertise in Flutter app development, you’re not just learning but
preparing to lead in the app development space. Visit Wegile’s Flutter App
Development Services to kickstart your project and leverage the power of Flutter to its
fullest. Let’s build something unique together!
Leave a Reply